How to Use CapCut: 15 Tips for Successful Video Editing
Find out everything you need to know to use CapCut, the official TikTok video editing application.
CapCut is one of the best video editing apps on mobile. The platform created by ByteDance, the parent company of TikTok, allows you to create quality montages in record time, thanks to very well-thought-out features. The application is calibrated for short and impactful videos to post on social networks. In this article, we offer you 15 tips to improve your edits on CapCut!
1. Add motion effect in videos
To add dynamism to your videos, CapCut offers a whole range of tools that allow you to integrate motion effects. To do this, you can use the Animation tool. This will add an effect to the start of the selected section. Here’s how to do it:
- Open your project,
- In the video track, tap the desired section,
- In the menu at the bottom, tap Animation,
- Add the animation you want.
The effect can also be achieved when transitioning between two sections of the video. To do this, simply press the cut and select the transition you want. You can then opt for a fade to black, an enlargement, a spiral, etc. However, certain animations and transitions are only accessible with the pro version of CapCut.
2. Put the video in slow motion on CapCut
Do you want to slow down your video or, on the contrary, create a nice timelapse? The process is very simple:
- Open your project,
- Tap the section of the video you want to change the speed of,
- In the bottom menu, choose Speed,
- Two options are available to you: Normal and Curved, click Normal,
- By moving the slider, you can slow down (or speed up) the video as you wish.
Note that if your video is 25 frames per second (fps), slow motion may cause it to jerk. To create a smooth slow motion, you will need to increase the fps when capturing the video. Also, the option Curve can be interesting. It allows you to vary the rhythm of the same section by speeding up and then slowing down passages.
3. Add a sound effect
Adding a sound effect can make your video more dynamic and colorful. It can in particular be adapted to a narrative framework. To add sound effects, the method is very simple:
- Open your project,
- Press Effects (icon star),
- You will then have access to a multitude of sound effects of varying lengths, classified by category. You can then choose from several laughter, ambient sounds, animal noises, horror sounds, etc.

4. Add effects to a voice
Voice editing is an option to know about if you want to maintain your anonymity, slightly adjust your tone, or add a fun effect. Here’s how to add effects to your voice:
- Open your project,
- If your audio is embedded in your video, unlink it by tapping the video track, then Extract the audio. You will then see the audio track displayed below,
- To change the effect, tap the soundtrack,
- Choose Vocal Effects. You can then choose the effect that suits you best.
You can choose to make the voice deeper or higher, give a microphone effect, or take a distorted voice!

5. Add automatic subtitles on CapCut
Subtitles are an essential element if you want to post a video on social media. Many users may have to watch your videos without sound because their environment is not suitable (on public transport for example). CapCut therefore offers functionality to create your subtitles quickly. For this, you will need a video with clear sound, which can be understood by the application. Here’s how to add automatic captions:
- Open your video project,
- Press Text,
- Tap Automatic Captions,
- Choisissez Son original,
- Press Start. CapCut will then automatically generate the subtitles.
Once the subtitles have been generated, it is possible to modify the text if you notice an error but also to delete passages of pause or hesitation (see video below). This will allow you to produce an in-camera video that eliminates parasitic elements in a few seconds.5. Add automatic subtitles on CapCut
6. Sync music with video
To create an engaging video, it can be beneficial to use audio that rhythmically matches the shots of the video. For this, CapCut offers a very well-designed tool: Autobeat. To use it, start by opening a new project then proceed as follows:
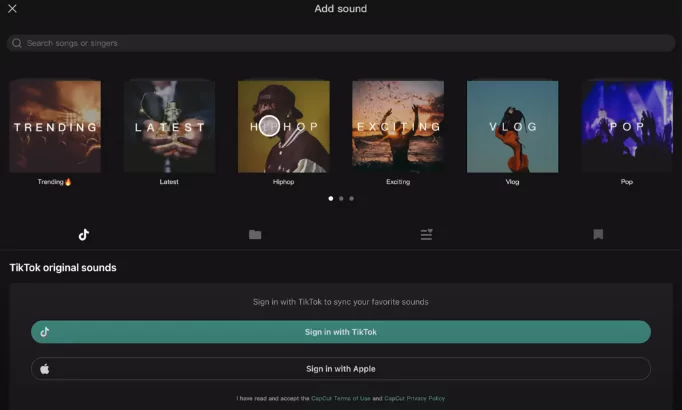
- Add the music you want by pressing Sounds in the bottom menu, you can then integrate music recorded on your smartphone, or choose one from the CapCut bank,
- Once you have chosen the music, tap the audio track, which appears below the video track,
- In the bottom menu, choose Rhythms,
- Check Generate automatically,
- The application will offer you two rhythms, one slow and one fast. They will be characterized by small yellow dots on the audio track. After choosing your rhythm, all you have to do is adapt the cuts of your montage to the yellow points to produce a video modeled on the rhythm of the music!
7. Change Video Background on CapCut
Changing the video background is a useful option for a few different reasons. It can allow you to camouflage your environment (if you do not want to show your interior for example), or to integrate decor related to the theme of your video. For this, no need to go green! Simply follow this procedure:
- Open your project,
- Embed the background video first,
- Tap Overlay, and Add overlay in the menu at the bottom. This is where you can add the video you shot (highlight video),
- After the video is embedded, tap Trim, then tap Remove Background.
And there you have it, the background will be changed! The application will offer you several cutting options, including the possibility of adding a colored outline around your silhouette.
8. Automatically correct colorimetry
When shooting a video with your smartphone, it is difficult to obtain an ideal result in terms of colorimetry. Adjustments are often necessary. In its Pro version, CapCut offers an effect that automatically corrects the colorimetry of your videos. Here’s how to do it:
- Open your video project,
- From the drop-down menu, choose Adjust,
- Press Auto Adjustment and CapCut will correct the colorimetry according to your video.
If you do not have access to the pro version, it is still possible to modify the colorimetry manually. Different options are offered next to automatic adjustment (Brightness, Contrast, Saturation, Temperature, etc.).
9. Create a 3D zoom effect on an image with CapCut
The 3D zoom effect on an image garnered a lot of success last year, due to a trend that appeared on TikTok. And for good reason, it allows you to bring an image to life, by producing an attractive animation dissociating the foreground and the background. CapCut offers a feature to achieve this effect in no time. Here’s how to do it:
- Open a new project,
- Add a photo. Preferably, it should include a person in the foreground and a nice decor behind,
- Tap the track of your image,
- In the bottom menu, choose Style,
- Press Pro 3D Zoom.
10. Blur faces
Blurring a face is a necessary option if you want to preserve your anonymity, or if you are filming a scene where strangers appear (if you are filming a video in the street for example). CapCut offers a tool to blur faces, here’s how to use it:
- Open your project and insert your video,
- In the bottom menu, choose Effects,
- Press Body Effects,
- Choose Blur Face.
You can change a few settings, including the blur level.
11. Use the CapCut teleprompter
On TikTok, a large part of the videos are made in front of the camera. This can be an intimidating exercise at times. To prevent you from getting lost in your text, CapCut offers you a prompt tool that will allow you to have your script in front of you throughout the video! Here are the steps to follow :
- From the home page, click on Prompter,
- A page allowing you to make a video will open. At the top of the page, you will see some text to edit. This is the text from the teleprompter,
- At the bottom of the text, click Edit (pencil icon),
- Then add your text. You can type it directly in the field, or paste it if you have already written it elsewhere.
- Once the text has been written, click on the Settings icon (hexagon icon on the right), to adjust the scrolling speed, font size, and color.
- Once the teleprompter is configured, you can select the duration of your video at the bottom (15 seconds, 60 seconds, or 3 minutes) and start recording with the central button. Your teleprompter will scroll according to your settings.
For a successful video, try to keep a natural look while playing!
12. Use CapCut video templates
Have you seen a TikTok trend that you like, and would you like to produce a video in the same spirit? Some videos in the application offer models that can be used directly in CapCut. Here’s how to do it:
- Go to TikTok, and select a video offering a CapCut template. Videos that have a template display an indication at the bottom left: CapCut: Try this template,
- Press this indication,
- Choose Use this template in CapCut, you will then be redirected to the editing application,
- Tap Use this template,
- CapCut will then ask you to integrate the number of photos/videos necessary
- Click Export. You can then export it to .mp4 and share it on a social network.
In CapCut, videos using templates are listed in the Templates section, next to your different projects. Good to know: if you want to access various templates on TikTok, you can write the keywords #CapCut or #CapCutTemplate in the search bar of the social network. Plus, CapCut’s TikTok account is full of templates to use!
13. Use CapCut online
CapCut is primarily designed for use on a mobile application, to share edits on social networks. However, even if it is less known, the tool is also available online! You can then log in with your account and benefit from a desktop interface. Via the Cloud, you can save projects and continue them on different media. Furthermore, all features are accessible online and 100% free.
14. Use CapCut on Windows or Mac
If the application is available online, it can also be downloaded on a PC or Mac, to be used as a desktop application. The tool then has functionalities similar to the mobile application but can support larger file sizes. It can thus make it possible to set up large-scale projects. In this sense, the software becomes much more than a tool for social networks but comes face to face with traditional desktop editing software, with the strong point of its ease of use. Plus, just like the online version, the Windows application is 100% free.
15. Switch to CapCut Pro
By using the free version of CapCut, you can produce very good quality videos and benefit from a large number of essential features. If you want to take the extra step on mobile, you can access the premium version of the application, CapCut Pro, for €9.99 per month.
You will have access to the following benefits:
- Professional features and effects: there are a multitude of options. For example, the pro version allows you to erase freckles, access new distortion or retro effects, additional transitions, new filters, etc.
- Benefit from 100 GB of Cloud space.
